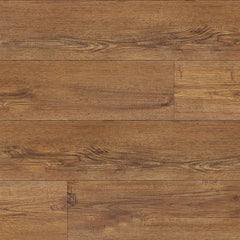
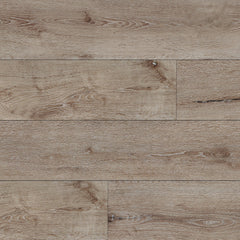
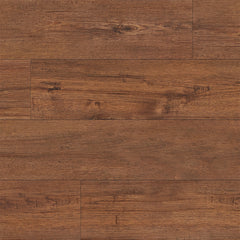
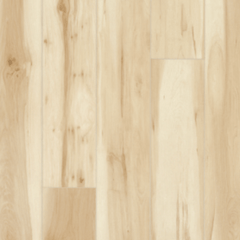
Welcome to a better way to buy flooring.

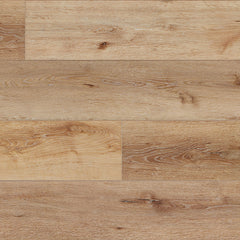
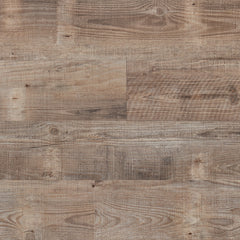
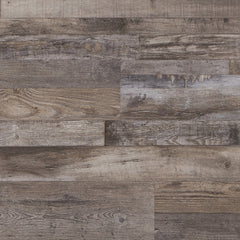
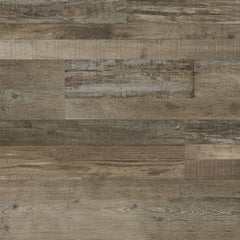
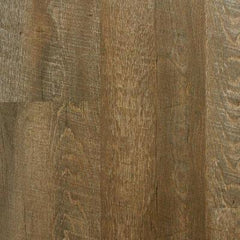
L.W. Mountain Quarry Venetian

Coverage Calculator

 SQFT

 Carton

$2.51

/SQFT


$40.26

/Carton


Total Price: 

Vendor : L.W. Mountain

Flooring Type:

Luxury Vinyl

Width:

12”

Length:

24”

Thickness:

5.2mm

Coverage:

16.02 Sq.ft/Carton

Wearlayer:

20 mil

Finish:

Special UV Cured

Install Type:

Click

Residential Warranty

Lifetime

Commercial Warranty

5 Year

Vendor : L.W. Mountain

General Information

• Do not store directly on concrete, allow for air circulation. Do not open the cartons but spread them out and protect corners from damage.

• To minimize shade variation, mix and install planks from several cartons.

• Avoid exposure to direct sunlight for prolonged periods; such exposure may result in discoloration.

• All subfloor patching must be done with a Portland based compound and allowed to dry completely prior to installing flooring.

• This product can be installed on, above, or below grade.

Tools needed

- Straight edge

- Pencil

- Chalk Line

- Measuring tape

- Power Crosscut Saw

- Jigsaw for cutting irregular shapes

- Rubber Mallet

- Blue or Green Painter’s Tape

- Assorted spacers

Planks needed to complete your project: Measure the length and width of your room. If the room has alcoves or offsets, measure these separately. This will give you the square footage of the room. Purchase a minimum of 10% extra to cover mistakes, trimming, and for future needs and replacement. Most installations require about 10% overage. However, this can vary depending upon the room size, layout and the experience of the installer.

For best results it is important to purchase product (cases) from the same batch number (dye lot). Different batch numbers can have shade variations. Every case of flooring has the batch number printed on the end of the case. Batch number example: AS01. If you do have more than one batch number, we highly recommend you install planks from 4 or 5 different cases from different batch number at one time and randomly mix them into the installation as you go. This will insure a more natural looking floor.

CAUTION: Do not install SPC/WPC - Vinyl Planks over carpet. This product is not suitable for any outside use, solariums, sauna, or rooms that have the potential of flooding. We also highly recommend you do not install in rooms or homes that are not temperature controlled.

Acclimation: The home should be at “normal living conditions” for a minimum of 1 week prior to and during installation. L.W. Mountain, Inc. does not require that the SPC/WPC - Vinyl Planks be acclimated before installation. It is noted that in extreme temperatures (hot or cold), the product will be easier to work with if it is allowed to obtain a temperature of 60-70 degrees before installation. The home should be maintained at 55-85 degrees and 35-55% humidity.

Subfloor Information

• All subfloors must be clean, flat, dry and structurally sound. The correct preparation of the subfloor is a major part of a successful installation. Roughness or unevenness of the subfloor may telegraph through the new floor covering, resulting in an unsightly surface and may cause excessive wear on high spots. Subfloor must be flat- 1/8" in 10' or 1/8".

• Carpet staples or adhesive residue must be removed to insure proper installation.

• Any unevenness over 1/8” (3 mm) must be sanded down or filled with a floor leveler. Voids or humps in the subfloor will prevent the locking mechanism from locking properly.

Wood Subfloors:

1. Do not install SPC/WPC – Vinyl Planks over wood subfloors which lay directly on concrete or over sleeper constructions.

2. All wood and wood composition panels are suitable for the use under SPC/WPC – Vinyl Planks providing that they are smooth, flat, structurally sound and free of deflection. The panels include plywood, particle board, oriented strand board (OSB), flake board and wafer board.

3. Basements and crawl spaces must be dry. Use of a 6 mil. black polyethylene is required to cover 100% of the crawl space earth. Crawl space clearance from ground to underside of joist is to be no less than 18" and perimeter vent spacing should be equal to 1.5% of the total square footage of the crawl space area to provide cross ventilation. Where necessary, local regulations prevail.

Concrete Subfloors:

1. The concrete subfloor must be dry, smooth and free from dust, solvent, paint, wax, grease, oil, and any other extraneous materials. The surface must be hard and dense, and free from powder or flaking.

2. New concrete slabs must be thoroughly dry (at least six weeks) and completely cured. The final responsibility for determining if the concrete is dry enough for installation of the flooring lies with the floor covering installer. Although SPC/WPC – Vinyl Planks are not susceptible to damage from moisture, excessive subfloor moisture is an ideal breeding ground for moldiness, mildew and fungus. The limited warranty does not cover discoloration from mold or from any kind of water damage caused by flooding, leaking or similar conditions.

3. Holes, grooves, expansion joints and other depressions must be filled with a latex underlayment, and troweled smooth and feathered even with the surrounding surface.

4. Concrete floors with in-floor radiant heating systems are allowed, provided the temperature of the floor never exceeds 85°F or 29°C. Before installing the flooring, the heating system must be turned on to eliminate residual moisture.

Existing Floor Covering:

1. SPC/WPC – Vinyl Plank can be installed over most existing hard–surface floor coverings, provided that the existing floor surface is smooth or can be made smooth.

2. Ceramic tiles should be made smooth by applying a cementitious overlay such as patching or levelling compound.

3. When the removal of the existing resilient floor covering is not an option then it must be covered with an embossing levelling compound or an equivalent to provide a smooth subfloor surface. Otherwise, telegraphing may occur.

4. Existing sheet vinyl should not be heavily cushioned and must consist of only one layer.

5. Never use solvents or citrus adhesive removers to remove old adhesive residue. Solvent residue left in and on the subfloor, may affect the new floor covering.

WARNING! DO NOT SAND, DRY SWEEP, DRY SCRAPE, DRILL, SAW, BEADBLAST OR MECHANICALLY CHIP OR PULVERIZE EXISTING RESILIENT FLOORING, BACKING, LINING FELT, ASPHALTIC "CUTBACK" ADHESIVES OR OTHER ADHESIVES.

These products may contain either asbestos fibers and/or crystalline silica. Avoid creating dust. Inhalation of such dust is a cancer and respiratory tract hazard. Smoking by individuals exposed to asbestos fibers greatly increases the risk of serious bodily harm. Unless positively certain that the product is a non-asbestos-containing material, you must presume it contains asbestos. Regulations may require that the material be tested to determine asbestos content and may govern the removal and disposal of material. See current edition of the Resilient Floor Covering Institute (RFCI) publication Recommended Work Practices for Removal of Resilient Floor Coverings for detailed information and instructions on removing all resilient covering structures. For current information go to www.rfci.com

NOTE: Before laying out the floor, check the wall you are starting from and make sure it is square to the opposite wall. Simply measure the room from opposite ends of the wall to the far wall. If the measurements are different, you can make adjustments on the first row by scribing the plank. SPC/WPC – Vinyl Plank is designed to be installed with the floating method. Never secure the planks to the subfloor. Always undercut all doorjambs. Never fasten wall moldings and or transition strips to the planks.

Installation:

1. Starting from the corner, lay a row of loose planks without securing them to each other first to determine if you need to adjust the layout or scribe the first row to conform to the starting wall.

2. Installation should start with the first piece in a corner and proceed from the wall with the groove facing out away from the wall. Allow a minimum gap of 1/4” for subfloor movement or product expansion, which should be covered by molding.

3. Line up the end of the next piece by overlapping the first. Using a rubber mallet, tap the joint together with a downward motion until the tongue and groove are securely locked. Continue in this manner until you have reached the end of the first row.

4. Be sure to keep the seams tight. You will feel and hear the click when locking the planks together to create a tight seam. There should be no gap visible between planks. If your seam appears not to be tight, you can immediately pull apart the planks and reapply it. Slowly and carefully lift the top plank away from the bottom plank and simply apply them repeating Step #3. Be careful not to pull the planks apart too fast or you could rip or damage the Locking Strip.

5. When installing SPC/WPC - Vinyl Plank, it is strongly recommended to stagger the rows so that the short edge (7”) seams are not in a straight uniform line. We recommend staggering the end-joints by a minimum of 8” but maintaining a random layout. Do not create a pattern.

6. Interlock the first plank tightly against the first row (long side) at a 15-20-degree angle.

7. Align the end of the next plank over the end groove of the previous plank and lower the side joint together. Tap the end joint down with the rubber mallet using a downward angle towards the adjoining plank until the tongue and groove lock together.

8. Inspect each plank after install to assure the long and short ends are tight.

9. Continue with the installation in this manner. Use end cuts as starters for the next rows as long as proper stagger is maintained.

NOTE: When cutting SPC/WPC - Vinyl Plank for length, be sure to always cut the short side of the plank with the groove edge. The remaining piece can then be used on the opposite side of the room at the end of that row if layout permits.

10. To fit around irregular objects, simply make a pattern out of heavy paper. Place the pattern upon the plank and trace. Cut along trace lines using a jigsaw. Be sure to leave a minimum of 1/4” expansion space around all fixed objects, floor vents, and door frames and walls.

11. When installing under door jambs, it may be required to carefully shave the top ledge of the groove. Use wood glue applied to bottom lip of the groove to secure. Hold in place with painter’s tape until glue is dry.

12. After complete, reinstall or add new quarter round to cover expansion space. Only nail straight into the wall base, do not nail down through the floor into the subfloor as this will eliminate the expansion properties.

13. Add appropriate transition moldings. Make sure the floor can float under the overlap of each transition profile.

• This is a floating floor system. As with all floating floors, do not install cabinets on top of flooring. The cabinets must be installed first and the flooring cut around them.

• Do not install in rooms or homes that are not temperature controlled. Exposure to long term direct sunlight can cause damage to your floor.

• Furniture should have felt pads attached to all legs and all metal tabs/nails removed.

• Do not use ball type castors as they can damage the floor. All castors or wheels should be easy swiveling and suitable for resilient flooring.

• SPC/WPC - Vinyl Plank is approved for installation over In-floor Radiant Heat. Floor temperature must not exceed 85 degrees Fahrenheit.

L.W. MOUNTAIN, INC. Wood Flooring has the following limited warranties:

1) Lifetime structural warranty

2) 50 Year finish wear-through warranty

This limited warranty is made subject to the following conditions:
    • The flooring must be used only indoors in residential areas.
    • The surface wear must not have occurred as a result on incorrect maintenance or accidents such as damage caused by scratching, impact, and cutting.
    • The surface wear must be readily visible (approximately 10% of the installed floor). Gloss reduction is not considered surface wear.
    • LWM warrants its products are free from manufacturing defects in lamination, milling and assembly for as long as you own it. LWM also warrants that its products will not buckle, cup or warp “when properly installed and normal humidity in the home (35%-55%) is maintained according to LWM recommended procedures”.
    • Wood is a natural product; variations in its grain pattern, color and/or texture are normal and are not considered defects and no warranty shall apply to those. The warranty will not apply to the natural color changes, which occur in wood over time.

WARRANTY EXCLUSIONS

LWM warranties do not cover indentations, scratches, or damages caused by negligence, exposure to extreme heat, dryness or water saturation, accidents, abuse, misuse indentation from stiletto heels, stains as a result of chemical or industrial products, improper installation and maintenance, insufficient protection or improper alternations of the original manufactured product.

This writing is the complete and exclusive statement of the warranty and is in lieu of all other express and /or implied warranties. LWM assumes no liability for incidental or consequential damages. This warranty gives you specific legal rights and you may also have other rights that vary from state to state. The sole remedy provided herein is the repair or replacement of defective products.

PREVENTIVE CARE

• Use rugs inside and outside entrances to prevent sand and abrasives from being tracked onto floor. Use soft woven rugs. Clean or replace rugs as needed.
• Apply felt pads on all furniture legs to ease movement and prevent scratches. When moving furniture or appliances, use caution to avoid scratching, indentations, or gouging.
• Use large soft polyurethane or rubber casters versus narrow rigid plastic ones.
• Maintain relative humidity level between 35%-55% for your good health, your wood floor and furnishings. In high humidity, the use of air conditioners or dehumidifiers will control the environment. During dry periods, use a humidifier.
• Stiletto high-heels and spiked sport shoes are not recommended on any flooring.

MAINTENANCE

• Wipe up spills quickly to protect floor from excess liquid.
• Sweep or vacuum your floor regularly to prevent dirt, dust and abrasives that can scratch or dull its finish.
NOTE: Vacuum only with a hard floor attachment. A revolving beater brush can hold grit which can damage the finish.
• Clean your floor as needed with any wood floor CLEANER.
  NO WAXES, POLISHES, OIL BASED DETERGENTS OR ABRASIVE CLEANERS SUCH AS STEEL WOOL CLEANERS.
• Spray a light mist onto the floor. Mop floor in a back-and-forth motion in the same direction as strips for best results.
• Never pour water or liquid cleaner directly onto floor surface.

FLOOR CARE TIPS

• Larger pets should have their claws trimmed to avoid scratching floors.
• For more difficult stains, dampen a cloth with mineral spirits and clean mess.
• Avoid long term exposure to direct sunlight. UV protective film applied on windows can help protect your flooring in addition to your energy savings.

CARE GUIDE:

• Use doormats outside each entrance to your home to prevent dirt, sand, grit and other substances from being tracked onto your floor. Use non-staining mats on your floor. Do not put rubber-backed, latex-backed or coco fiber mats on your floor because they will stain or damage the surface.

• Close your curtains or blinds where extreme sunlight hits the floor. Exposure to long term direct sunlight can cause discoloration to your floor.

• Support furniture with wide-bearing, non-staining floor protectors. Ideally, the protectors should be at least one inch in diameter, made of non-pigmented hard plastic, and rest flat on the floor. Non-staining felt protectors are also acceptable. Casters (type W), felt pads or floor protectors are recommended for all moveable furniture. Use protection mats under chairs with caster to avoid abrasion of the vinyl flooring. Make sure that any metal protectors are rust-proof.

• If you need to move heavy furniture and/or appliances across the floor, always use strips of wood or hardboard runways to protect the floor. Always use runways even if you have an appliance dolly, or even if the heavy objects are equipped with wheels or rollers.

• Occasional mopping with Rinse-Free Cleaner is recommended when dirt builds up and sweeping alone is not sufficient. Follow strictly the guidelines given on the bottle. Do not use wax, polish, soap or detergent products.

L.W. Mountain Quarry Trim Stair Nose
(#SPCT-STN-6)
by LW Mountain Vinyl
$53.08
L.W. Mountain Quarry Trim T-Molding
(#SPCT8034TM)
by LW Mountain Vinyl
$42.31
L.W. Mountain Quarry Trim Reducer
(#SPCT8034RE)
by LW Mountain Vinyl
$42.31

Related Products