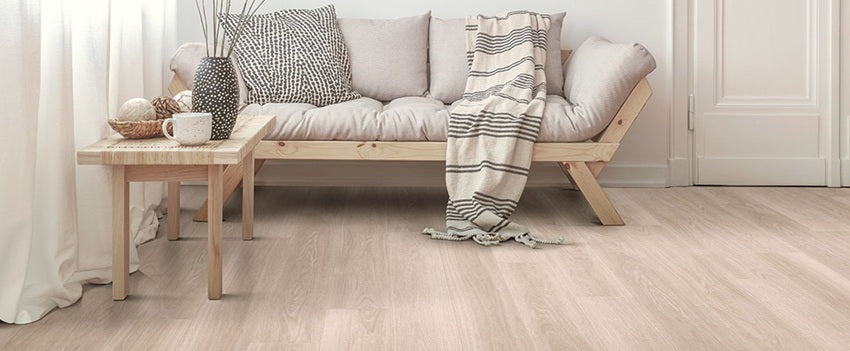
Get Inspired

Flooring Market Pro Services
⭐ Flooring Market Pro Services
The Smarter, Faster Way for Contractors to Get Materials
Contractors deal with enough chaos on the jobsite.
Your material sourcing shouldn’t add to it.
Flooring Market Pro Services gives contractors a simpler, more reliable way to get the flooring and tile materials they need — with consistent pricing, fast communication, and real support that keeps jobs moving.
No subscriptions.
No portals to learn.
No commitments.
Just the kind of help that makes your workday easier.
Why Contractors Choose Pro Services
⏱ Save 5–10 Hours Every Week
Stop chasing materials, tracking freight, and calling three supply houses for the same quote.
With Pro Services, you send your list — and everything is handled for you.
-
Pricing
-
Stock checks
-
Alternatives if something’s out
-
Freight coordination
-
Tracking updates
-
Delivery follow-through
You stay focused on installs.
We stay focused on the details.
💰 Stable, Predictable Pricing
Tired of quotes that change depending on who picks up the phone?
With Pro Services, pricing stays consistent, which means:
-
More accurate bids
-
Cleaner job costing
-
No surprise price jumps
-
Better cash-flow planning
You get real numbers you can trust — every time.
📦 Faster Access to the Materials You Use Most
We source from multiple regional warehouses, giving you better availability across major brands:
Schluter Systems
Ditra, Kerdi, trims, profiles, shower components, waterproofing, and more.
LATICRETE
254 Platinum, Tri-Lite, HYDRO BAN, NXT Level, Permacolor grout, and other contractor-trusted mortars & waterproofing.
Hard Surface Flooring
LVP, LVT, Hardwood, and carpet tile for multifamily, retail, office, and renovation work.
If it exists in the supply chain, we hunt it down.
🚚 Freight You Don’t Have to Babysit
Freight shouldn’t feel like detective work.
We manage:
-
Delivery windows
-
Terminal communication
-
Tracking updates
-
Re-routes
-
Damage claims
-
Residential & jobsite coordination
You stay informed — without doing the chasing.
🔧 Support That Actually Understands the Trade
You work with a real person who knows:
-
Product compatibility
-
Project timelines
-
Contractor schedules
-
The material flow of real jobs
-
The urgency behind “I need this by Tuesday”
Text, email, or call — whatever fits into your day.
Real Scenarios Pro Services Solves Every Week
“I’m missing one Schluter trim and it’s Friday at 3.”
We’ve sourced it, shipped it, and saved the job.
“I’ve got 100 units to build this year and I need consistent stock.”
We keep the same SKU, same price, same availability.
“I’m finishing a store rollout and need matching materials across states.”
We coordinate the sourcing and the freight so your installs stay uniform.
“I run a two-person crew. I can’t spend half my day tracking stuff down.”
You send your list. We handle the rest.
What You Get With Flooring Market Pro Services
-
✔ A dedicated Pro Services rep
-
✔ Fast quotes
-
✔ Consistent pricing
-
✔ Real-time communication
-
✔ Reliable freight
-
✔ Access to major brands
-
✔ Support with jobsite timelines
-
✔ Zero subscription fees
No hoops. No gimmicks. Just easier sourcing.
How It Works (Simple & Fast)
1️⃣ Send Your Materials List
A screenshot, photo, PDF, or full takeoff — anything works.
2️⃣ Get Your Quote
Clear pricing and clear freight. No surprises.
3️⃣ Approve & Ship
We coordinate delivery and updates.
4️⃣ Materials Arrive
You get what you need — without chasing suppliers.
The Quiet Advantage Contractors Don’t Talk About Enough
When materials show up on time…
When pricing stays steady…
When freight is handled…
When sourcing isn’t a battle…
You build more, install more, and stress less.
Flooring Market Pro Services isn’t a luxury — it’s a practical edge that keeps your business running smoother than your competitors’.
Ready to Make Your Jobs Easier?
Whether you run a one-man crew or manage hundreds of units a year, Pro Services gives you the support you wish traditional suppliers offered.
📩 Want a quote?
Send your list — any format works.
📞 Prefer to talk?
Tell us when you’re free.
💬 Have a question?
Text anytime.
You work hard enough already.
Let the sourcing be the easy part.
- Billy Peska

Pro Services DIY Series: Tub Surround Remodel with the Schluter KERDI‑TUBKIT
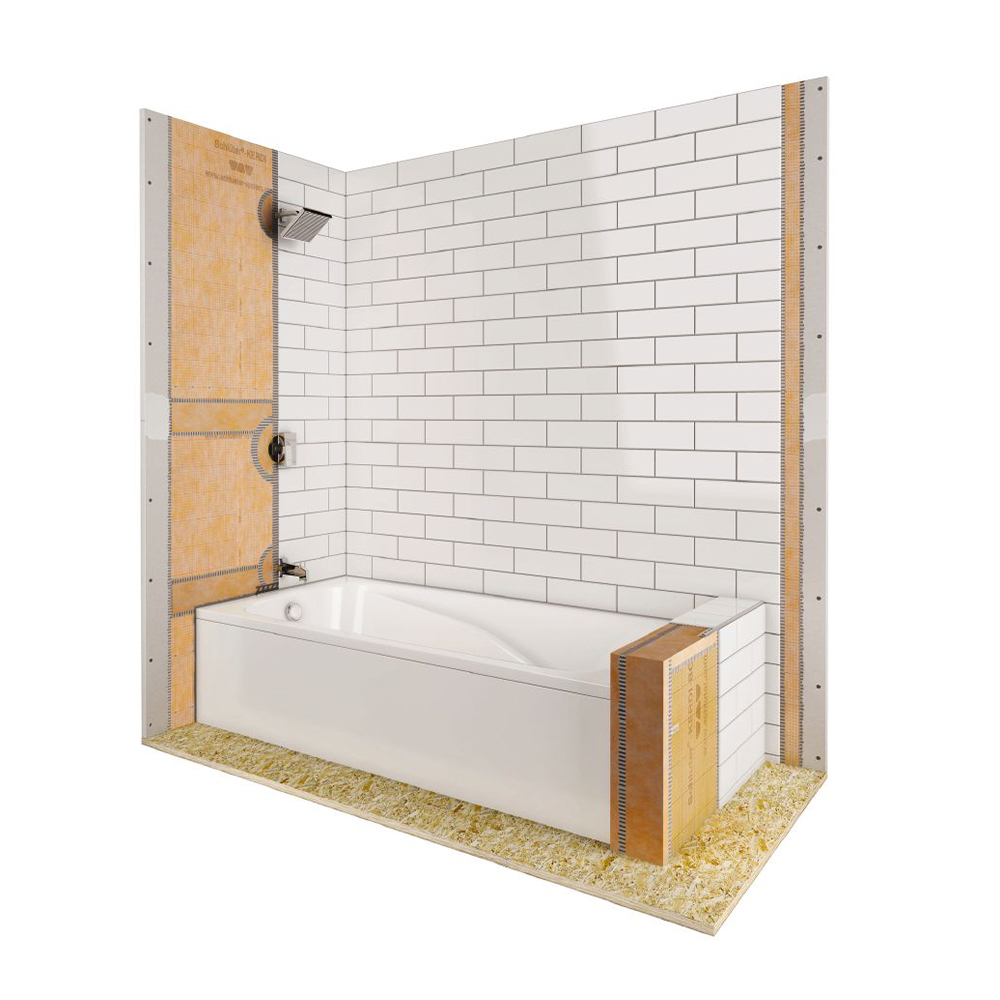
Transforming a bathtub + tile surround into a fully waterproof, vapor‑tight enclosure is one of the most critical steps in a bathroom remodel — and one of the easiest to get wrong. That’s where the Schluter® KERDI‑TUBKIT makes the difference. This comprehensive kit delivers everything you need to waterproof your tub surround properly and significantly reduce the risk of future moisture problems like mold, efflorescence, or tile detachment.
In this blog post, we’ll walk you through a clear, actionable installation guide — including a helpful video from the manufacturer. Whether you're a confident DIYer or a pro looking to streamline the process, this step‑by‑step overview will help you plan, prep, install, and finish your tub surround with confidence.
Why the KERDI‑TUBKIT is a smart choice
-
The kit is designed specifically to create a fully waterproof and vapor‑tight assembly for tiled bathtub surrounds.
-
By using a sheet‑applied membrane (KERDI) plus engineered sealing components (band, pipe seal, mixing‑valve seal, bonding compound), you’re getting a systemized solution—not just “an extra layer” of protection.
-
It simplifies sourcing all the right materials — professionals and DIYers alike benefit from using a kit rather than piecing together disparate components.
Watch first: Overview of installation
How to Install the Schluter®‑KERDI‑TUBKIT
Before digging in, take 5‑10 minutes to watch this overview video from Schluter. It gives you a great visual of how the components fit together, how the membrane is applied, and how tile is installed afterward.
Installation Guide: Step by Step
1. Preparation & substrate check
-
Make sure your bathtub surround framing and substrate are appropriately installed and in good condition. For example: drywall or cement board is properly secured, studs are plumb, fasteners are appropriate for tile applications.
-
Clean the substrate: remove dust, debris, drywall mud ridges, and any potential “loose” surface. The membrane will bond better on a sound flat surface.
-
Check for any protrusions (nail/ screw heads) and ensure that plumbing rough‑in is complete (valves, shower rod, tub filler). You don’t want to apply the waterproofing and discover a plumbing change.
-
Review the layout: plan where your seams will fall, how your corners will be sealed, and how you will address the tub‑to‑wall junction.
2. Dry‑fit & plan membrane placement
-
From the kit: you’ll have KERDI sheet, KERDI‑BAND for sealing seams/penetrations, KERDI‑SEAL‑PS for pipe penetrations, KERDI‑SEAL‑MV for the mixing‑valve rough‑in, and KERDI‑FIX (sealing/bonding compound) for bonding membrane to substrate.
-
Lay out the membrane sections so that you minimize seams in high‑risk areas (corners where water will run, junction of tub deck to wall, etc.).
-
Ensure your membrane overlaps (per manufacturer’s specs) and that the tub lip area has a solid coverage.
-
Pre‑cut any needed pieces (e.g., bands for corners) so the installation flows smoothly.
3. Apply the KERDI membrane
-
Using the KERDI‑FIX compound, apply a thin, consistent layer onto the substrate with a flat trowel (typically a 3/16" x 5/32" notch or as spelled out in the manufacturer handbook).
-
Immediately press the KERDI sheet into the compound; smooth it out with a roller or flat tool to remove trapped air and ensure full contact.
-
At the tub deck‑to‑wall junction: the membrane must turn onto the horizontal ledge and up the wall to form a continuous waterproof plane.
-
For inside corners: pre‑install KERDI‑BAND or fold the KERDI sheet carefully to maintain full coverage. All seams should be sealed with KERDI‑BAND and KERDI‑FIX.
-
Overlap seams by recommended width (typically 2" or more as per Schluter instructions).
-
For pipe penetrations: use the KERDI‑SEAL‑PS and KERDI‐SEAL–MV components to form a tight waterproof seal around the pipe or mixing valve.
4. Seal the tub flange and lip
-
One of the most frequent leak points is the junction where the tub flange meets the wall and the membrane meets the tub. With the membrane turned over the flange edge (if possible), use the sealing compound and banding to ensure a tight seal.
-
Ensure that the tub deck is level or has the correct slope toward drain (if applicable in your tub design) and that the membrane is properly adhered onto/over the face of the tub flange.
5. Let the system cure / check for voids
-
After installation of the membrane and banding, inspect all seams, corners and pipe penetrations closely. Ensure there are no wrinkles, voids, or un‑bonded areas.
-
Many installers will lightly mist the surface with water or visually inspect for any gaps—it’s much easier to fix now than after tile is applied.
-
Allow any adhesives or bonding compounds to set per manufacturer’s curing time before proceeding to tile.
6. Tile installation
-
With the waterproof substrate in place, you can proceed to apply thin‑set mortar and tile as you would in a traditional tile bath surround — only difference: you’re now building on top of the KERDI membrane system, which is YOUR primary waterproof barrier.
-
Use a compatible thin‑set mortar (typically latex‑modified) and appropriate grout and sealants per tile manufacturer’s recommendations.
-
For tile touching the tub deck: consider an expansion joint (movement joint) between the tile and tub or caulk appropriately using a silicone or urethane bath‑grade sealant to allow for tub movement.
-
Once tile and grout are done, wipe down, clean up any excess mortar or bonding compound and let the grout cure fully before sealing or use.
7. Final inspection & finish details
-
Inspect the entire installation: tub‑to‑wall junction, corners, pipe penetrations, any seams. No gaps, no exposed membrane edges.
-
Apply caulk where tile meets tub flange to maintain water barrier continuity.
-
If using glass enclosures or rods, install after tile set and ensure sealant is applied where glass meets tile.
-
Provide user with proper maintenance guidance: avoid high‑impact or harsh chemicals, monitor for grout or caulk wear and replace as needed.
Tips & Best Practices
-
Order extra membrane: It’s smart to have a bit more than the calculated area — cut‑offs, mistakes, and overlaps add up.
-
Follow manufacturer handbook: The full installation handbook from Schluter gives detailed specs (trowel size, overlap width, curing times).
-
Mind the tub flange condition: A warped or damaged tub flange will make sealing tricky. Address any flange issues before membrane installation.
-
Use movement joints where required: In large surrounds, expansion joints should be included per tile manufacturer’s recommendation and integrated with the waterproofing system.
-
Don’t skip the corners: Corners are often the weakest leak point. Proper banding, smoothing, and waterproofing here pays dividends.
-
Check local codes: Some locales require secondary drains, ventilation standards, or other code compliance – ensure your remodel meets them.
If you’re looking to remodel your bathtub surround and want professional‑grade waterproofing without the guesswork, the Schluter® KERDI‑TUBKIT delivers a straightforward, reliable solution. By combining the kit with the step‑by‑step guide above (and the linked video), you’re setting yourself up for a long‑lasting, tile‑ready environment that protects the structure beneath for years to come.
Have questions about planning your tile layout, selecting thin‑set, or handling niche and bench details? I’m happy to help with those next steps too. You can purchase this all in one kit by visiting this link. Schluter Kerdi Tub Kit
- Billy Peska
Daltile: Why Buying America’s #1 Tile Brand at FlooringMarket.com Is the Smart Choice
TL;DR
Daltile is the largest ceramic tile manufacturer in the world and the top-selling tile brand in the United States. At FlooringMarket.com, you can shop Daltile with the strength of one of the largest flooring retailers in America, backed by 500+ employees, over half a million square feet of warehousing, nationwide delivery, and clear return policies.
________________________________________
Why Daltile Is a Household Name in Flooring
Daltile has been a leader in tile for decades, known for combining style, durability, and innovation. With one of the most extensive collections in the industry, Daltile offers solutions for every design vision — from modern kitchens to classic bathrooms to large-scale commercial spaces.
________________________________________
What Makes Daltile Stand Out?
• Unmatched Selection: From ceramic and porcelain to glass, mosaics, and natural stone, Daltile covers every category.
• Durability: Daltile products are engineered to withstand daily wear, moisture, and heavy foot traffic.
• Design Leadership: Endless options in colors, patterns, shapes, and textures allow for both timeless and on-trend looks.
• Made in the USA: Many Daltile products are proudly designed, developed, and manufactured domestically.
• Sustainability: Daltile emphasizes recycled materials and eco-conscious manufacturing, making it a greener choice.
________________________________________
Why Buy Daltile Online at FlooringMarket.com?
1. One of America’s Largest Flooring Retailers
FlooringMarket.com is supported by 500+ employees and over half a million square feet of warehouse space. That scale ensures strong stock availability, quick fulfillment, and the buying power to offer competitive pricing.
2. Nationwide Delivery
We ship Daltile products directly to homes and jobsites across the U.S., complete with order tracking so you can schedule installations with confidence.
3. Ecommerce Convenience
Skip the limitations of local retail. With FlooringMarket.com, you can shop Daltile 24/7, compare collections side by side, and order when it fits your schedule.
4. Clear Returns
Return policies vary by product and manufacturer. Please contact us if you have any questions about your specific order.
5. Expert Support
Our team is here to answer questions about specs, shipping, or installation guidance — without the pressure of a showroom sales pitch.
________________________________________
Applications for Daltile Flooring and Surfaces
• Residential Homes: Beautiful, durable floors and walls for kitchens, bathrooms, entryways, and living spaces.
• Commercial Spaces: Daltile’s strength and variety make it a top choice for offices, restaurants, and retail.
• Custom Designs: From mosaics to decorative accents, Daltile offers flexibility for unique design projects.
________________________________________
FAQs About Daltile
1. Is Daltile good quality?
Yes. Daltile is widely recognized as the top tile brand in the U.S., offering products that balance performance, design, and longevity.
2. Where is Daltile made?
Many of Daltile’s products are designed, developed, and manufactured in the U.S. with an emphasis on sustainable practices.
3. Does Daltile work in high-moisture areas?
Yes. Porcelain and ceramic Daltile products are waterproof and ideal for kitchens, bathrooms, and laundry rooms.
4. Can Daltile be shipped nationwide?
Yes. FlooringMarket.com delivers Daltile products nationwide with order tracking included.
5. Why buy Daltile online instead of at a local store?
Shopping online gives you 24/7 access, reliable nationwide delivery, and the backing of one of America’s largest flooring retailers.
________________________________________
Shop Daltile Online Today
Daltile is the leader in ceramic tile and natural stone — and FlooringMarket.com makes it simple to bring this trusted brand into your home or project. Backed by scale, experience, and nationwide reach, we’re the smart choice for buying Daltile online.
• Shop Daltile
- Robert Sandlin

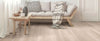
Is Laminate Flooring Pet-Friendly?
TL;DR
Laminate flooring is a strong choice for pet owners thanks to its scratch resistance, easy cleaning, and affordability. While not fully waterproof, many modern laminate options offer enhanced moisture resistance, making them practical for homes with cats and dogs.
________________________________________
Why Pet Owners Consider Laminate Flooring
For many households, pets are part of the family. That means your flooring needs to be durable enough for daily wear, easy to clean after messes, and comfortable for your pets to live on. Laminate has become a popular option because it checks many of those boxes without the higher price tag of hardwood or stone.
________________________________________
Durability Against Scratches and Wear
Laminate floors are built with a protective wear layer that resists scratches from pet nails and everyday activity. While no flooring is entirely scratch-proof, higher-quality laminate performs well in active homes with dogs or cats.
Tips for pet owners:
• Keep nails trimmed to reduce surface scratches.
• Use mats or pads in areas where pets frequently play or rest.
________________________________________
Moisture Resistance for Accidents and Spills
Traditional laminate was vulnerable to water damage, but today’s products often come with improved moisture resistance. Some lines are even marketed as waterproof, which makes them safer for homes with pets prone to accidents.
It’s still best to wipe up spills quickly, but modern laminate can handle occasional mishaps much better than older versions.
________________________________________
Easy Cleaning and Maintenance
Between shedding fur, muddy paws, and the occasional accident, pets can bring plenty of mess into your home. Laminate flooring is easy to maintain with regular sweeping, vacuuming, or a light damp mop.
Unlike carpet, laminate won’t trap allergens, making it a healthier choice for households sensitive to dander or dust.
________________________________________
Comfort and Safety for Pets
Laminate provides a smooth, cool surface that pets often enjoy. While it isn’t as soft as carpet, it can be paired with rugs or pet mats to add cushioning for older animals or those with joint issues. This balance makes it both practical for owners and comfortable for pets.
________________________________________
Cost-Effectiveness for Pet-Friendly Homes
Laminate is typically more budget-friendly than hardwood or stone while still offering a stylish look. For pet owners, it provides long-term value:
• Resistant to scratches and stains.
• Easier to replace damaged planks if needed.
• Lower upfront cost compared to natural materials.
________________________________________
Why Buy Laminate Flooring Online at FlooringMarket.com?
• Convenience: Browse and order anytime, from anywhere.
• Fast Shipping: Have laminate delivered directly to your home or jobsite, complete with tracking updates.
• Clear Returns: Return policies vary by product and manufacturer. Please contact us if you have any questions about your specific order.
• Support You Can Trust: Our team is available to answer questions about product details, shipping, or installation guidance.
________________________________________
FAQs About Laminate Flooring for Pets
1. Is laminate scratch-proof for pets?
Not completely, but the wear layer is designed to resist everyday scratches. High-quality laminate performs well in active homes with dogs or cats.
2. What if my pet has an accident on laminate?
Clean spills quickly to avoid damage. Many modern laminate options are water-resistant, so occasional accidents won’t ruin the floor.
3. Does laminate trap pet hair or dander?
No. Unlike carpet, laminate doesn’t trap allergens, making it easier to clean and maintain.
4. Is laminate comfortable for pets?
Yes, though it’s firmer than carpet. Rugs or mats can provide extra comfort in favorite resting spots.
5. Is laminate a good value for pet owners?
Yes. Laminate offers durability and style at a lower price than hardwood or stone, making it a cost-effective flooring choice for families with pets.
________________________________________
Shop Laminate Flooring Online Today
Laminate is a pet-friendly, durable, and budget-conscious option for modern households. If you’re ready to upgrade your home, FlooringMarket.com makes it simple:
• Shop Laminate Flooring
________________________________________
Categories: Laminate, Pets, Lifestyle & Design
Type: Article
- Robert Sandlin
Why Buy Paramount Flooring at FlooringMarket.com?
TL;DR
Paramount Flooring offers a wide range of hardwood, engineered wood, luxury vinyl, and porcelain tile collections that balance style, performance, and value. At FlooringMarket.com, you can shop Paramount products online with fast shipping, clear return policies, and expert support.
________________________________________
Paramount Flooring: Style Meets Performance
Paramount has built a reputation for creating flooring that blends beauty, durability, and practical design. Whether you’re updating a family room, outfitting a new kitchen, or refreshing a commercial space, Paramount provides options to match nearly any vision.
________________________________________
What Makes Paramount Flooring Unique?
1. Wide Range of Collections
Paramount manufactures multiple flooring categories:
• Hardwood & Engineered Wood: Classic looks in oak, walnut, and hickory.
• Luxury Vinyl Plank (RigidCORE & Bliss): Waterproof performance with wood and stone visuals.
• Porcelain Tile: Durable, easy-care surfaces for kitchens, baths, and entryways.
2. Design Flexibility
From rustic barnwood planks to modern stone-inspired tiles, Paramount’s portfolio makes it easy to create a consistent look throughout your home or mix materials for different rooms.
3. Quality & Durability
Each Paramount product is built with long-lasting materials designed to handle daily life, whether it’s kids, pets, or high-traffic areas. Their waterproof vinyl options and tough porcelain surfaces provide peace of mind in busy households.
4. Trusted Brand Reputation
Paramount has earned recognition in the flooring industry for reliable construction and versatile style options, making it a brand contractors and homeowners both trust.
________________________________________
Why Buy Paramount Flooring Online at FlooringMarket.com?
• Convenience: Shop Paramount collections anytime, anywhere — no waiting for store hours.
• Fast Shipping: Orders ship directly to your home or jobsite with full tracking updates.
• Clear Returns: Return policies vary by product and manufacturer. Please contact us if you have any questions about your specific order.
• Expert Support: Our team is here to answer questions about specifications, shipping, or installation guidance.
________________________________________
FAQs About Paramount Flooring
1. What types of flooring does Paramount offer?
Paramount produces hardwood, engineered hardwood, luxury vinyl plank, and porcelain tile collections — giving you options for nearly every room.
2. Is Paramount flooring durable?
Yes. From waterproof vinyl to tough porcelain, Paramount products are designed for long-lasting performance in active homes and commercial spaces.
3. Can I install Paramount flooring myself?
Some products, such as luxury vinyl plank, are designed for DIY-friendly installation. Hardwood and tile may require professional installation for best results.
4. Does Paramount offer waterproof flooring?
Yes. Paramount’s luxury vinyl plank collections are fully waterproof, making them ideal for kitchens, bathrooms, and basements.
5. Where can I buy Paramount flooring?
FlooringMarket.com carries a full selection of Paramount products with online ordering, fast shipping, and clear return policies.
________________________________________
Shop Paramount Flooring Online Today
Upgrade your home with the durability and design of Paramount Flooring, now available at FlooringMarket.com.
• Shop Paramount Flooring
________________________________________
Categories: Hardwood, Vinyl, Tile & Stone, Manufacturer Brands
Type: Article
- Robert Sandlin
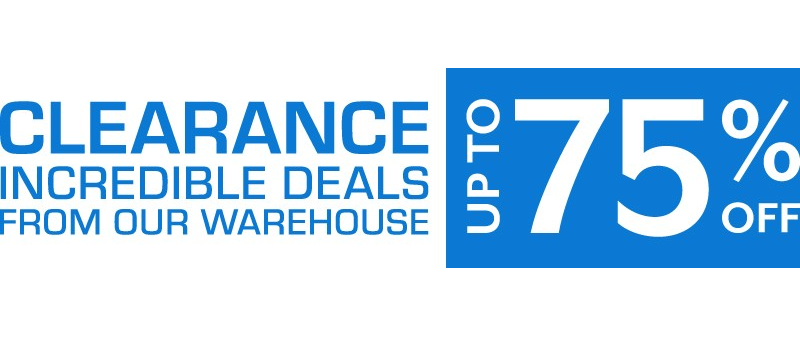
Why Buying Clearance Flooring at FlooringMarket.com Is a Smart Move
TL;DR
FlooringMarket.com offers unbeatable deals on clearance flooring, backed by the strength of one of the largest flooring retailers in the United States. With new items added regularly, nationwide delivery, and clear return policies, shopping clearance online is the smartest way to save on premium floors.
________________________________________
What Is Clearance Flooring?
Clearance flooring is a chance to buy high-quality flooring at reduced prices. These items may include overstock, discontinued colors, or limited inventory runs. The products are first-quality, but quantities are often limited — making clearance a great opportunity for budget-conscious homeowners and contractors alike.
________________________________________
Why Buy Clearance Flooring Online at FlooringMarket.com?
1. One of the Largest Flooring Retailers in America
FlooringMarket.com is backed by a company with 500+ employees and over half a million square feet of warehouse space. That scale means more clearance opportunities than smaller retailers can offer, plus the ability to keep inventory moving so new deals are always available.
2. Constantly Updated Deals
Our clearance selection changes regularly as new products enter the warehouse. That means fresh chances to save big on luxury vinyl, hardwood, laminate, carpet tile, and tile & stone.
3. Nationwide Delivery
Clearance products ship directly to your home or jobsite with tracking provided. You don’t need to haul pallets yourself — we deliver it straight to you.
4. Transparent Return Policies
Return policies vary by product and manufacturer. Please contact us if you have any questions about your specific order.
5. Ecommerce Convenience
Skip the limited hours of local stores. With FlooringMarket.com, you can shop clearance flooring 24/7, compare styles online, and order with confidence.
________________________________________
Types of Clearance Flooring You’ll Find
• Luxury Vinyl Flooring (LVP/LVT): Waterproof, durable, and pet-friendly at clearance pricing.
• Hardwood & Engineered Wood: Classic looks at reduced cost, perfect for high-impact spaces.
• Laminate Flooring: Scratch-resistant and budget-friendly, even more affordable on clearance.
• Carpet Tile: Commercial-grade comfort at discounted prices.
• Tile & Stone: Porcelain, ceramic, and natural looks available while supplies last.
________________________________________
FAQs About Clearance Flooring
1. Is clearance flooring lower quality?
No. Clearance items are first-quality flooring products. They are discounted because of overstock, discontinued lines, or limited remaining inventory.
2. How often does clearance inventory change?
Frequently. FlooringMarket.com updates clearance offerings as new items move through the warehouse. Check back often for the latest deals.
3. Can clearance flooring be shipped nationwide?
Yes. All clearance products are available for direct-to-jobsite or home delivery with tracking.
4. Are clearance items returnable?
Yes, but return policies vary by product and manufacturer. Please contact us if you have any questions before placing your order.
5. Why shop clearance online instead of in-store?
Shopping clearance online gives you 24/7 access to updated inventory, the scale of one of America’s largest flooring retailers, and the convenience of fast delivery.
________________________________________
Shop Clearance Flooring Online Today
FlooringMarket.com combines the strength of one of the nation’s largest flooring retailers with the convenience of ecommerce. With new clearance flooring arriving regularly and nationwide delivery available, now is the perfect time to upgrade your space for less.
• Shop Clearance Flooring
________________________________________
Categories: Clearance, Vinyl, Hardwood, Laminate, Carpet, Tile & Stone
Type: Article
- Robert Sandlin