How to Determine Your Starting Wall
This is the first and the most important step toward flooring installation. It locks in the rest of the installation for a smooth, professional look. A well-laid plan enables the installer to avoid layout problems and guarantees the floor continues to flow correctly. Here are some tips and tricks to consider during this process—along with a few myths to avoid.
1. Start with the Longest, Straightest Wall
This is the most common rule of thumb. By starting at the longest and most visible wall, you help orient the rest of your floor for clean alignment. You want straight lines in the areas that attract the most attention in your room, leaving any necessary cuts for less visible areas (like under furniture or behind doors).
Pro Tip:
About ½ inch out on your starting wall, snap a chalk line to use as a guide. This line will work for you, even if your wall is a bit crooked.
Myth Busted:
"Any wall will do." Not true! If you just pick a wall randomly, it will be a great source for misaligned planks and uneven gaps that are hard to fix later.
2. Work With Room Flow
Think about how your flooring will be flowing in and through the space; for instance, in an open area, you would want the planks to align between the rooms. In hallways, running your flooring parallel to the long axis of the space usually seems best, offering a steady and harmonious perception to the room.
Pro Tip:
While determining the starting wall, consider the flow of traffic through the space. You want the flooring to act as a guide for people moving through the room.
Myth Busted:
"Start at the shortest wall to minimize cuts." This may sound sensible, but it destroys a balanced layout. Symmetry is worth more than cuts; easy-cutting adjustments need not be made for bad design.
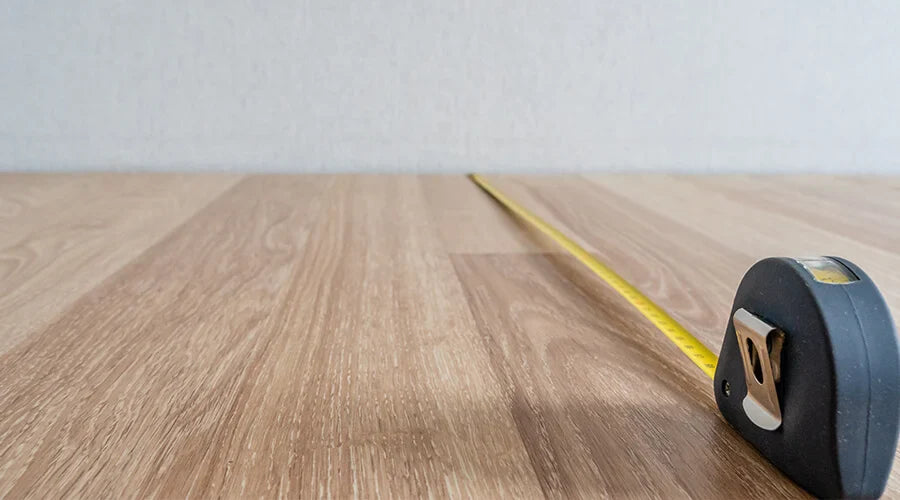
3. Choose a Wall That’s Easy to Measure From
From a determining point of view, angling walls and having curved walls can be the hardest thing to measure. Starting from a flat wall surface allows one to set up a good reference from which measurements can be taken. This minimizes any measurement error and will assist in keeping your rows straight.
Pro Tip:
In case none of the walls are absolutely straight, pick the one that will be less visible if adjustments are required (usually one behind the furniture).
Myth Busted:
"All existing walls in the new building are straight." Rarely true. Even the finest job nowadays may have some slight wall deformations. Therefore, even in newly minted structures, against-its-definition obsolescent guides would probably work best. Adhere to your dimensioning.
4. Think About Your Focal Points
Does your room have a fireplace, large windows, or another focal point? Your flooring should complement that feature by drawing the eye toward it. Starting on a wall that guides the planks toward the focal point can enhance the room’s overall look.
Pro Tip:
Use temporary spacers along the wall to maintain expansion gaps, ensuring your floor has room to expand and contract without warping.
5. Avoid Common Installation Mistakes
Here’s a summary of common mistakes to steer clear of:
-
Choosing a random starting wall: Leads to uneven results.
-
Ignoring flow between rooms: Creates disjointed transitions.
-
Skipping a chalk line: Can result in wavy flooring rows.
Taking time to plan your starting point can save hours of rework down the line.
6. Test Your Layout Before You Commit
Lay a few planks along your chosen starting wall without adhesive or locking them in place. This gives you a preview of how the layout will look and helps you confirm that your measurements are accurate. Adjust if necessary before making things permanent.
Final Thoughts
Choosing the right starting wall is all about balance, symmetry, and flow. By following these tips, you’ll be well on your way to a flawless floor installation.
Still have questions? Our team at Flooringmarket.com is here to help with expert advice and tools to keep your project on track. Happy flooring!
- Robert Sandlin