Pro Services DIY Series: Tub Surround Remodel with the Schluter KERDI‑TUBKIT

Transforming a bathtub + tile surround into a fully waterproof, vapor‑tight enclosure is one of the most critical steps in a bathroom remodel — and one of the easiest to get wrong. That’s where the Schluter® KERDI‑TUBKIT makes the difference. This comprehensive kit delivers everything you need to waterproof your tub surround properly and significantly reduce the risk of future moisture problems like mold, efflorescence, or tile detachment.
In this blog post, we’ll walk you through a clear, actionable installation guide — including a helpful video from the manufacturer. Whether you're a confident DIYer or a pro looking to streamline the process, this step‑by‑step overview will help you plan, prep, install, and finish your tub surround with confidence.
Why the KERDI‑TUBKIT is a smart choice
-
The kit is designed specifically to create a fully waterproof and vapor‑tight assembly for tiled bathtub surrounds.
-
By using a sheet‑applied membrane (KERDI) plus engineered sealing components (band, pipe seal, mixing‑valve seal, bonding compound), you’re getting a systemized solution—not just “an extra layer” of protection.
-
It simplifies sourcing all the right materials — professionals and DIYers alike benefit from using a kit rather than piecing together disparate components.
Watch first: Overview of installation
How to Install the Schluter®‑KERDI‑TUBKIT
Before digging in, take 5‑10 minutes to watch this overview video from Schluter. It gives you a great visual of how the components fit together, how the membrane is applied, and how tile is installed afterward.
Installation Guide: Step by Step
1. Preparation & substrate check
-
Make sure your bathtub surround framing and substrate are appropriately installed and in good condition. For example: drywall or cement board is properly secured, studs are plumb, fasteners are appropriate for tile applications.
-
Clean the substrate: remove dust, debris, drywall mud ridges, and any potential “loose” surface. The membrane will bond better on a sound flat surface.
-
Check for any protrusions (nail/ screw heads) and ensure that plumbing rough‑in is complete (valves, shower rod, tub filler). You don’t want to apply the waterproofing and discover a plumbing change.
-
Review the layout: plan where your seams will fall, how your corners will be sealed, and how you will address the tub‑to‑wall junction.
2. Dry‑fit & plan membrane placement
-
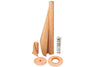
From the kit: you’ll have KERDI sheet, KERDI‑BAND for sealing seams/penetrations, KERDI‑SEAL‑PS for pipe penetrations, KERDI‑SEAL‑MV for the mixing‑valve rough‑in, and KERDI‑FIX (sealing/bonding compound) for bonding membrane to substrate.
-
Lay out the membrane sections so that you minimize seams in high‑risk areas (corners where water will run, junction of tub deck to wall, etc.).
-
Ensure your membrane overlaps (per manufacturer’s specs) and that the tub lip area has a solid coverage.
-
Pre‑cut any needed pieces (e.g., bands for corners) so the installation flows smoothly.
3. Apply the KERDI membrane
-
Using the KERDI‑FIX compound, apply a thin, consistent layer onto the substrate with a flat trowel (typically a 3/16" x 5/32" notch or as spelled out in the manufacturer handbook).
-
Immediately press the KERDI sheet into the compound; smooth it out with a roller or flat tool to remove trapped air and ensure full contact.
-
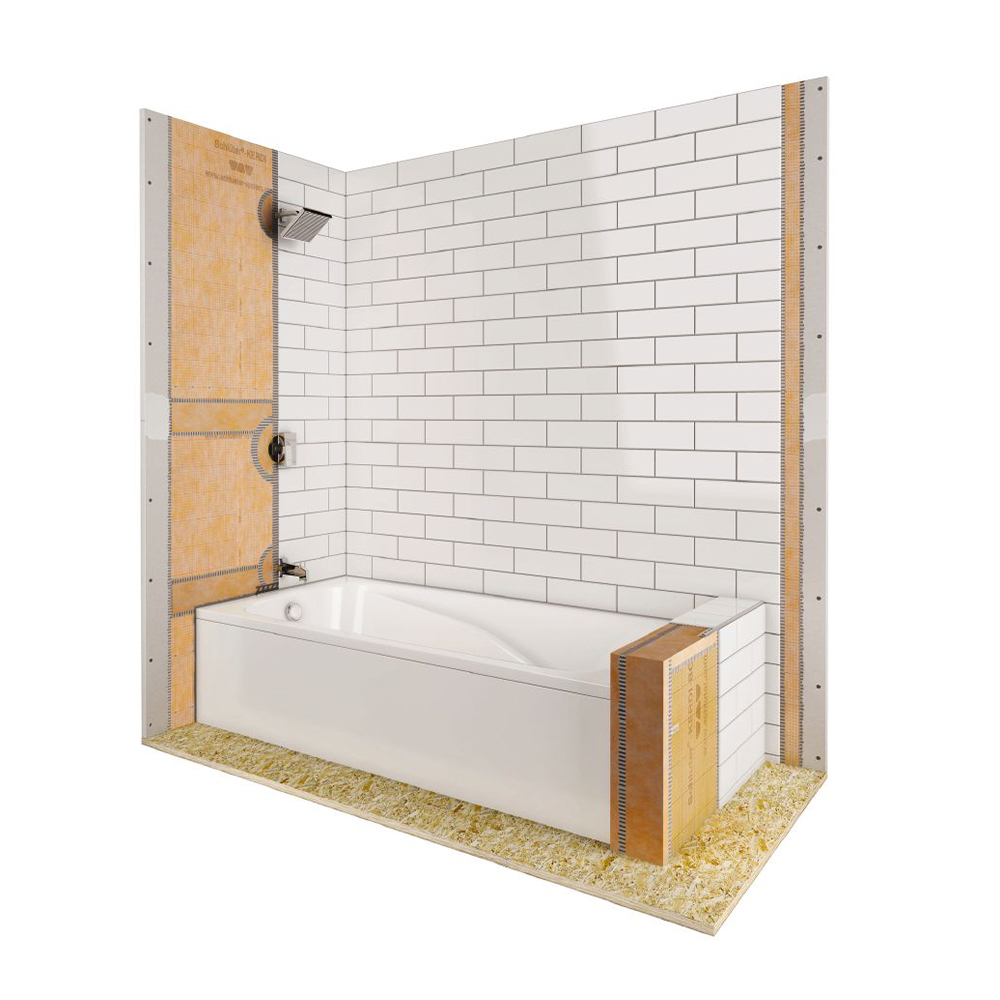
At the tub deck‑to‑wall junction: the membrane must turn onto the horizontal ledge and up the wall to form a continuous waterproof plane.
-
For inside corners: pre‑install KERDI‑BAND or fold the KERDI sheet carefully to maintain full coverage. All seams should be sealed with KERDI‑BAND and KERDI‑FIX.
-
Overlap seams by recommended width (typically 2" or more as per Schluter instructions).
-
For pipe penetrations: use the KERDI‑SEAL‑PS and KERDI‐SEAL–MV components to form a tight waterproof seal around the pipe or mixing valve.
4. Seal the tub flange and lip
-
One of the most frequent leak points is the junction where the tub flange meets the wall and the membrane meets the tub. With the membrane turned over the flange edge (if possible), use the sealing compound and banding to ensure a tight seal.
-
Ensure that the tub deck is level or has the correct slope toward drain (if applicable in your tub design) and that the membrane is properly adhered onto/over the face of the tub flange.
5. Let the system cure / check for voids
-
After installation of the membrane and banding, inspect all seams, corners and pipe penetrations closely. Ensure there are no wrinkles, voids, or un‑bonded areas.
-
Many installers will lightly mist the surface with water or visually inspect for any gaps—it’s much easier to fix now than after tile is applied.
-
Allow any adhesives or bonding compounds to set per manufacturer’s curing time before proceeding to tile.
6. Tile installation
-
With the waterproof substrate in place, you can proceed to apply thin‑set mortar and tile as you would in a traditional tile bath surround — only difference: you’re now building on top of the KERDI membrane system, which is YOUR primary waterproof barrier.
-
Use a compatible thin‑set mortar (typically latex‑modified) and appropriate grout and sealants per tile manufacturer’s recommendations.
-
For tile touching the tub deck: consider an expansion joint (movement joint) between the tile and tub or caulk appropriately using a silicone or urethane bath‑grade sealant to allow for tub movement.
-
Once tile and grout are done, wipe down, clean up any excess mortar or bonding compound and let the grout cure fully before sealing or use.
7. Final inspection & finish details
-
Inspect the entire installation: tub‑to‑wall junction, corners, pipe penetrations, any seams. No gaps, no exposed membrane edges.
-
Apply caulk where tile meets tub flange to maintain water barrier continuity.
-
If using glass enclosures or rods, install after tile set and ensure sealant is applied where glass meets tile.
-
Provide user with proper maintenance guidance: avoid high‑impact or harsh chemicals, monitor for grout or caulk wear and replace as needed.
Tips & Best Practices
-
Order extra membrane: It’s smart to have a bit more than the calculated area — cut‑offs, mistakes, and overlaps add up.
-
Follow manufacturer handbook: The full installation handbook from Schluter gives detailed specs (trowel size, overlap width, curing times).
-
Mind the tub flange condition: A warped or damaged tub flange will make sealing tricky. Address any flange issues before membrane installation.
-
Use movement joints where required: In large surrounds, expansion joints should be included per tile manufacturer’s recommendation and integrated with the waterproofing system.
-
Don’t skip the corners: Corners are often the weakest leak point. Proper banding, smoothing, and waterproofing here pays dividends.
-
Check local codes: Some locales require secondary drains, ventilation standards, or other code compliance – ensure your remodel meets them.
If you’re looking to remodel your bathtub surround and want professional‑grade waterproofing without the guesswork, the Schluter® KERDI‑TUBKIT delivers a straightforward, reliable solution. By combining the kit with the step‑by‑step guide above (and the linked video), you’re setting yourself up for a long‑lasting, tile‑ready environment that protects the structure beneath for years to come.
Have questions about planning your tile layout, selecting thin‑set, or handling niche and bench details? I’m happy to help with those next steps too. You can purchase this all in one kit by visiting this link. Schluter Kerdi Tub Kit
- Billy Peska