Get Inspired

Why Property Management Companies Should Buy Flooring from FlooringMarket.com
TL;DR
Property management companies need flooring that’s durable, affordable, and easy to source in bulk. FlooringMarket.com, backed by one of the largest flooring retailers in the United States, offers nationwide delivery, competitive pricing, and the scale to support portfolios of any size — making us the smart choice for property managers.
________________________________________
The Challenge for Property Management Companies
Property management firms oversee everything from single rental homes to large apartment complexes. Flooring must be:
• Durable enough to withstand frequent turnover.
• Cost-effective to keep renovation budgets in check.
• Available in volume to support multiple units and consistent design.
• Easy to order and deliver without project delays.
That’s where FlooringMarket.com delivers unmatched value.
________________________________________
Why FlooringMarket.com Is the Right Choice for Property Managers
1. Backed by Scale and Strength
We’re one of the largest flooring retailers in the U.S., with 500+ employees and over half a million square feet of warehouse space. That scale means we maintain deep inventory and strong supplier relationships to keep products in stock and moving fast.
2. Nationwide Delivery
Whether managing properties in one city or across multiple states, FlooringMarket.com provides nationwide shipping with tracking, so materials arrive when and where you need them.
3. Competitive Pricing at Scale
Our buying power means we secure competitive pricing from major flooring manufacturers. That helps property managers stretch budgets further while still installing high-quality floors that attract and retain tenants.
4. Broad Selection for Every Property Type
From durable luxury vinyl plank for rentals, to carpet tile for common areas, to tile and stone for high-end units, FlooringMarket.com offers a complete portfolio of flooring options suitable for every property type.
5. Streamlined Online Ordering
Skip phone calls and showroom visits. FlooringMarket.com allows property management teams to order 24/7, compare categories side by side, and manage multiple projects online.
6. Clear Returns
Return policies vary by product and manufacturer. Please contact us if you have any questions about your specific order.
7. Customer-First Support
We know property managers juggle tight timelines. Our team provides responsive, knowledgeable support to keep your flooring projects on track — without the pressure of in-store sales tactics.
________________________________________
Popular Flooring for Property Management Needs
• Luxury Vinyl Flooring (LVP/LVT): Waterproof, durable, and cost-effective — ideal for apartments and rentals.
• Carpet Tile: Quick to install, replace, and maintain — perfect for multi-family common areas and offices.
• Laminate Flooring: Scratch-resistant and budget-friendly for high-turnover rental units.
• Tile & Stone: Long-lasting and stylish for premium spaces.
________________________________________
FAQs for Property Managers Buying Flooring
1. Can you handle bulk flooring orders for multi-unit properties?
Yes. With large-scale warehousing and supplier relationships, FlooringMarket.com can handle orders for both small and large property portfolios.
2. Do you ship to multiple locations?
Yes. We offer nationwide delivery and can ship flooring directly to properties, offices, or job sites across the U.S.
3. How do you keep costs competitive?
As one of America’s largest flooring retailers, our scale gives us strong buying power, which translates into competitive prices for our customers.
4. Is your flooring durable enough for rental properties?
Absolutely. Our most popular products for property managers — LVP, carpet tile, and laminate — are designed to withstand high traffic, frequent turnover, and long-term wear.
5. Why not just buy from a local retail store?
Local stores often have limited inventory, higher costs, and slower fulfillment. FlooringMarket.com combines scale, nationwide reach, and ecommerce convenience to give property managers what they need most: reliable supply, fast delivery, and great value.
________________________________________
Partner with FlooringMarket.com Today
For property management companies, flooring isn’t just about style — it’s about durability, cost, and efficiency. With the strength of one of the nation’s largest flooring retailers, FlooringMarket.com delivers the selection, pricing, and logistics you need to keep your properties looking their best.
• Connect With PRO Service today!
________________________________________
Categories: Commercial, Property Management, Vinyl, Carpet, Tile & Stone
Type: Article
- Robert Sandlin
What Is Schluter DITRA and DITRA-XL?
TL;DR
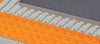
Schluter®-DITRA and DITRA-XL are uncoupling membranes designed for ceramic and stone tile installations. They provide waterproofing, vapor management, and crack prevention — protecting your subfloor and extending the life of your tile. Available now at FlooringMarket.com with fast shipping, nationwide delivery, and clear return policies.
________________________________________
Why Tile Needs an Underlayment
Tile is a premium flooring choice, but it’s vulnerable to cracking if the subfloor shifts or moisture builds underneath. That’s where Schluter®-DITRA and DITRA-XL come in. These underlayment membranes create a stable foundation, ensuring your tile or stone installation looks better and lasts longer.
________________________________________
Schluter DITRA: Reliable Everyday Protection
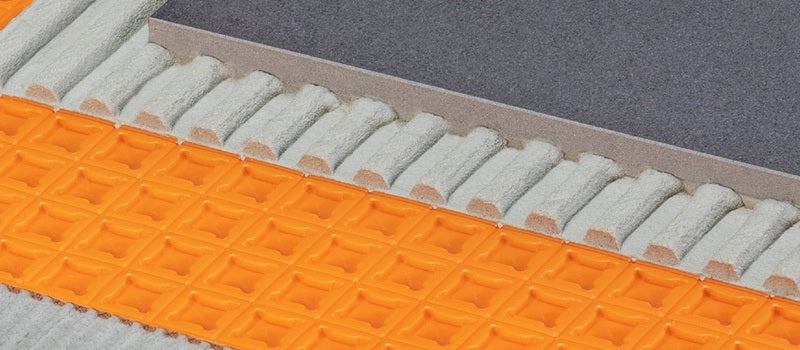
• Uncoupling Technology: Reduces stress transfer, preventing cracks in tile and grout.
• Waterproof Layer: Protects plywood, OSB, and other moisture-sensitive subfloors.
• Vapor Management: Channels beneath the membrane allow moisture to escape harmlessly.
• Strong Support: Even load distribution lets tile handle heavy foot traffic.
DITRA is a proven choice for most residential and light commercial projects.
________________________________________
Schluter DITRA-XL: For Larger Tile and Extra Demands
• Thicker Profile: Ideal for installations requiring added height.
• Enhanced Uncoupling: Designed to support larger-format tile and more challenging substrates.
• Commercial-Ready Strength: Durable enough for high-traffic environments.
DITRA-XL gives installers flexibility for projects where added performance is required.
________________________________________
Key Benefits of Schluter DITRA & DITRA-XL
• Prevents cracked tile and grout
• Protects subfloors from moisture damage
• Allows vapor release, avoiding trapped water
• Provides long-term durability in high-traffic areas
• Lightweight, easy to cut, and installer-friendly
________________________________________
Why Buy Schluter DITRA Online at FlooringMarket.com?
• One of America’s Largest Flooring Retailers: Backed by 500+ employees and over half a million sq. ft. of warehouse space.
• Nationwide Delivery: Orders ship quickly, with tracking provided so you can plan confidently.
• Clear Returns: Return policies vary by product and manufacturer. Please contact us if you have any questions about your specific order.
• Trusted Support: Our team helps answer product, shipping, and installation questions — without the pressure of in-store sales tactics.
________________________________________
FAQs About Schluter DITRA
1. Do I really need DITRA under tile?
Yes. DITRA provides uncoupling, waterproofing, and vapor management that thinset alone cannot. It’s the recommended choice for long-lasting tile performance.
2. What’s the difference between DITRA and DITRA-XL?
DITRA is the standard option for most residential projects. DITRA-XL is thicker, better for large-format tile, and suited for higher demands.
3. Can I use DITRA on wood subfloors?
Yes. Both DITRA and DITRA-XL protect moisture-sensitive substrates like plywood and OSB.
4. Is DITRA difficult to install?
No. It’s lightweight, easy to cut, and designed for straightforward installation when following Schluter’s instructions.
5. Where can I buy Schluter DITRA?
FlooringMarket.com offers Schluter DITRA and DITRA-XL with nationwide delivery, clear returns, and the backing of one of America’s largest flooring retailers.
________________________________________
Order Schluter DITRA and DITRA-XL Today
Protect your tile installation with underlayment that delivers proven results.
SHOP DITRA
________________________________________
- Robert Sandlin

COREtec Flooring: Why It’s a Top Choice and Why Buying Online at FlooringMarket.com Makes Sense
TL;DR
COREtec flooring is 100% waterproof, pet-friendly, and built for durability with styles that fit every home. While local retailers may offer in-store browsing, FlooringMarket.com delivers COREtec online with instant quotes, fast shipping, clear return policies, and trusted support — all without leaving your home.
________________________________________
What Makes COREtec Flooring Stand Out?
COREtec has become one of the most recognized names in luxury vinyl flooring for good reason. Their collections combine realistic wood and stone looks with performance features that stand up to busy households.
Key Features of COREtec Floors:
• 100% Waterproof: Safe for kitchens, bathrooms, and basements.
• Petproof & Kidproof: Designed to handle scratches, spills, and heavy foot traffic.
• Comfort & Quiet: Many COREtec planks include attached underlayment for sound reduction and added comfort.
• Durability: Options like COREtec Pro are built for high-traffic and light commercial use.
• Variety: Choose from wood looks, stone visuals, and tile alternatives to match any design style.
________________________________________
COREtec Collections You’ll Find Online
• COREtec Originals: Comfortable, quiet, and stain-resistant — the classic choice.
• COREtec Pro: Extremely durable, perfect for high-traffic areas and commercial spaces.
• COREtec Tile: Stylish alternatives to traditional tile with easier installation.
• COREtec Enhanced: Thicker planks for added comfort and noise reduction.
No matter the collection, COREtec focuses on delivering style + performance + ease of living.
________________________________________
COREtec vs. Other Vinyl Flooring
While many brands offer luxury vinyl plank, COREtec sets itself apart with:
• A strong reputation for innovation and quality.
• Industry-leading warranties (residential and commercial).
• Styles designed to reduce noise and increase comfort underfoot.
• A wide selection that balances everyday practicality with high-end design.
________________________________________
Why Buy COREtec Online at FlooringMarket.com Instead of Local Retail?
1. Transparent Pricing via Instant Quotes
Local retailers may require in-person visits and lengthy quote processes. At FlooringMarket.com, you can request an instant online quote directly from the product page — available 24/7 with no store hours or sales pressure.
2. 24/7 Convenience
Skip store hours and appointments. Shopping online lets you explore COREtec collections whenever it works for you.
3. Fast Shipping with Tracking
Your order ships directly to your address or project site with tracking updates, so you can plan your installation confidently.
4. Clear Returns
Return policies vary by product and manufacturer. Please contact us if you have any questions about your specific order.
5. Independent Installation Choice
Unlike retailers that bundle installation, FlooringMarket.com gives you flexibility: install COREtec yourself or hire your preferred contractor.
6. Support You Can Trust
Our online team can answer questions about product specs, shipping, and installation guidance without the pressure of a retail sales pitch.
________________________________________
FAQs About COREtec Flooring
1. Is COREtec flooring really waterproof?
Yes. COREtec planks and tiles are 100% waterproof, making them ideal for kitchens, bathrooms, basements, and laundry rooms.
2. How long does COREtec flooring last?
With proper care, COREtec floors can last 20–30 years in residential settings. Collections like COREtec Pro are also rated for commercial use.
3. Is COREtec good for homes with pets?
Absolutely. COREtec floors are scratch-resistant and pet-friendly, designed to handle accidents and daily wear.
4. Do I need to buy COREtec at a local retailer?
No. FlooringMarket.com carries COREtec flooring with 24/7 instant online quotes, fast shipping, and trusted support — making online purchasing a reliable option.
5. What collections are best for high-traffic areas?
COREtec Pro is designed for durability in high-traffic residential and commercial spaces. COREtec Originals and Enhanced also work well for active households.
________________________________________
Shop COREtec Flooring Online Today
COREtec flooring combines style, performance, and peace of mind — and FlooringMarket.com makes it simple to order.
SHOP CORETEC NOW
- Robert Sandlin

Why Buying Luxury Vinyl Flooring at FlooringMarket.com Is a Smart Choice
TL;DR
FlooringMarket.com offers one of the nation’s best selections of luxury vinyl flooring, backed by the strength of one of the largest flooring retailers in America. With 500+ employees, over half a million square feet of warehouse space, and decades of experience, we combine scale and trust with the convenience of online shopping.
________________________________________
What Is Luxury Vinyl Flooring?
Luxury vinyl flooring (often called LVP or LVT) is one of today’s most popular flooring categories. It combines the realistic look of hardwood or stone with durability, waterproof performance, and easy maintenance. Available in planks or tiles, luxury vinyl is versatile enough for every room — from kitchens and bathrooms to living rooms and basements.
________________________________________
Why Luxury Vinyl Flooring Is a Great Choice
• 100% Waterproof: Perfect for kitchens, baths, basements, and laundry rooms.
• Durable: Resists scratches, dents, and daily wear from kids, pets, and heavy traffic.
• Easy to Maintain: Simple cleaning with sweeping and mopping — no waxing required.
• Comfortable: Softer underfoot than traditional tile or stone, often with built-in sound reduction.
• Stylish: Available in realistic wood and stone visuals with modern color palettes.
________________________________________
Why Buy Luxury Vinyl Flooring at FlooringMarket.com?
1. Backed by Scale and Strength
FlooringMarket.com is part of one of the largest flooring retailers in America, supported by 500+ employees, over half a million square feet of warehouse space, and decades of industry expertise. That scale ensures better product availability, deep brand partnerships, and the ability to deliver quickly nationwide.
2. Nationwide Delivery
Our logistics network moves flooring efficiently across the country. Orders ship with full tracking, helping you plan your project confidently.
3. Partnerships With Major Flooring Brands
Being a top retailer allows us to work directly with trusted flooring manufacturers, giving you access to authentic products and consistent stock at competitive prices.
4. Customer-First Service
Size matters — but so does service. FlooringMarket.com combines the reliability of a major flooring retailer with the convenience and transparency of ecommerce.
5. Clear Returns
Return policies vary by product and manufacturer. Please contact us if you have any questions about your specific order.
________________________________________
Benefits of Luxury Vinyl Flooring at FlooringMarket.com
• Luxury Vinyl Flooring for Every Room: Waterproof durability for kitchens, baths, and basements; style for living rooms and entryways.
• Luxury Vinyl Plank & Tile Options: Plank formats that replicate hardwood and tile visuals that mimic natural stone.
• Nationwide Flooring Delivery: Supported by more than half a million square feet of warehousing capacity.
• One of America’s Largest Flooring Retailers: Scale, experience, and trust backing every order.
• Customer Service You Can Count On: Our team supports you at every step, from questions to delivery.
________________________________________
FAQs About Luxury Vinyl Flooring
1. Is luxury vinyl flooring really waterproof?
Yes. Luxury vinyl flooring is 100% waterproof, making it one of the best choices for bathrooms, basements, and kitchens.
2. How long does luxury vinyl last?
With proper care, luxury vinyl flooring can last 15–25 years, depending on the product line and installation quality.
3. Is luxury vinyl good for homes with pets?
Absolutely. Luxury vinyl is durable, scratch-resistant, and easy to clean — perfect for pet-friendly households.
4. What makes FlooringMarket.com different?
We’re one of the largest flooring retailers in America, backed by 500+ employees, over half a million square feet of warehousing, and a proven commitment to customer-first service.
5. Do I have to visit a store to buy luxury vinyl?
No. With FlooringMarket.com, you can order online anytime, get answers from our support team, and receive flooring delivered directly to your jobsite or home.
________________________________________
Shop Luxury Vinyl Flooring Online Today
FlooringMarket.com combines the strength of one of America’s largest flooring retailers with the convenience of ecommerce. With scale, experience, nationwide delivery, and customer-focused service, buying luxury vinyl flooring online from us is the smart choice.
• Shop Luxury Vinyl Flooring
________________________________________
Categories: Vinyl, Lifestyle & Design, Manufacturer Brands
Type: Article
________________________________________
- Robert Sandlin

FlooringMarket.com Now Carries Mohawk Aladdin Commercial Carpet Tile
TL;DR
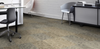
FlooringMarket.com now offers Mohawk Aladdin Commercial Carpet Tile — a durable, stylish, and sustainable flooring solution designed for offices, schools, healthcare, and retail spaces. Shop online with fast shipping, clear return policies, and trusted customer support.
Mohawk Aladdin Carpet Tile: A Commercial Flooring Essential
Choosing the right flooring for a commercial space is a big decision. It needs to hold up to heavy foot traffic, look professional, and be easy to maintain. That’s why we’re proud to bring Mohawk Aladdin Commercial Carpet Tile to FlooringMarket.com. This trusted collection combines long-lasting performance with modern design flexibility, making it a smart choice for any business or public environment.
Why Aladdin Carpet Tile Stands Out
1. Designed for High-Traffic Environments
From busy office corridors to hospital waiting rooms, Aladdin carpet tiles are built to withstand constant use. They resist wear, stains, and fading — giving your floors a professional look that lasts.
2. Simple Installation & Maintenance
Because they’re modular, carpet tiles are easier to install than traditional broadloom carpet. If one section gets damaged, you can replace individual tiles instead of the entire floor, saving time and money.
3. Flexible Design Options
Aladdin comes in a wide range of colors, textures, and patterns. Whether you need a neutral backdrop for an office or a bold statement for a retail store, there’s a style to match your brand and space.
4. Sustainable Flooring Choice
Mohawk is an industry leader in eco-friendly flooring. Aladdin carpet tile includes recycled content and low-VOC materials, supporting healthier indoor air quality and green building certifications.
Why Buy Aladdin Carpet Tile Online at FlooringMarket.com?
-
Convenience: Browse and order 24/7 from your office or home.
-
Fast Shipping: Direct-to-jobsite delivery with full tracking updates.
-
Clear Returns: Return policies vary by product and manufacturer. Please reach out to us with any questions before ordering.
-
Trusted Support: Get help with product details, shipping timelines, and order questions from our online team.
Applications for Aladdin Carpet Tile
-
Corporate Offices: Professional, modern designs that enhance workspaces.
-
Healthcare Facilities: Durable, hygienic flooring with easy maintenance.
-
Schools & Universities: Long-lasting tiles that stand up to heavy student traffic.
-
Retail & Hospitality: Stylish, versatile flooring that supports customer experience.
FAQs About Mohawk Aladdin Commercial Carpet Tile
1. Why choose carpet tile over broadloom?
Carpet tile is easier to install, repair, and replace. Instead of redoing an entire floor, you can swap out a damaged tile in minutes.
2. How long does Aladdin carpet tile last?
With proper care, Mohawk Aladdin carpet tile can provide 10–20 years of performance in commercial settings, even with heavy traffic.
3. Is it suitable for high-moisture areas?
Carpet tile is not designed for areas with standing water, but it works well in most indoor commercial spaces including lobbies, hallways, classrooms, and offices.
4. What’s the return policy when ordering online?
Return policies vary by product and manufacturer. Contact our team anytime for help understanding the return details that apply to your order.
5. How is shipping handled?
We ship directly to your business or jobsite with tracking provided. This ensures you can plan your installation schedule with confidence.
Order Mohawk Aladdin Carpet Tile Online Today
Bring style, durability, and sustainability to your commercial space with Mohawk Aladdin Carpet Tile, now available at FlooringMarket.com.
- Robert Sandlin
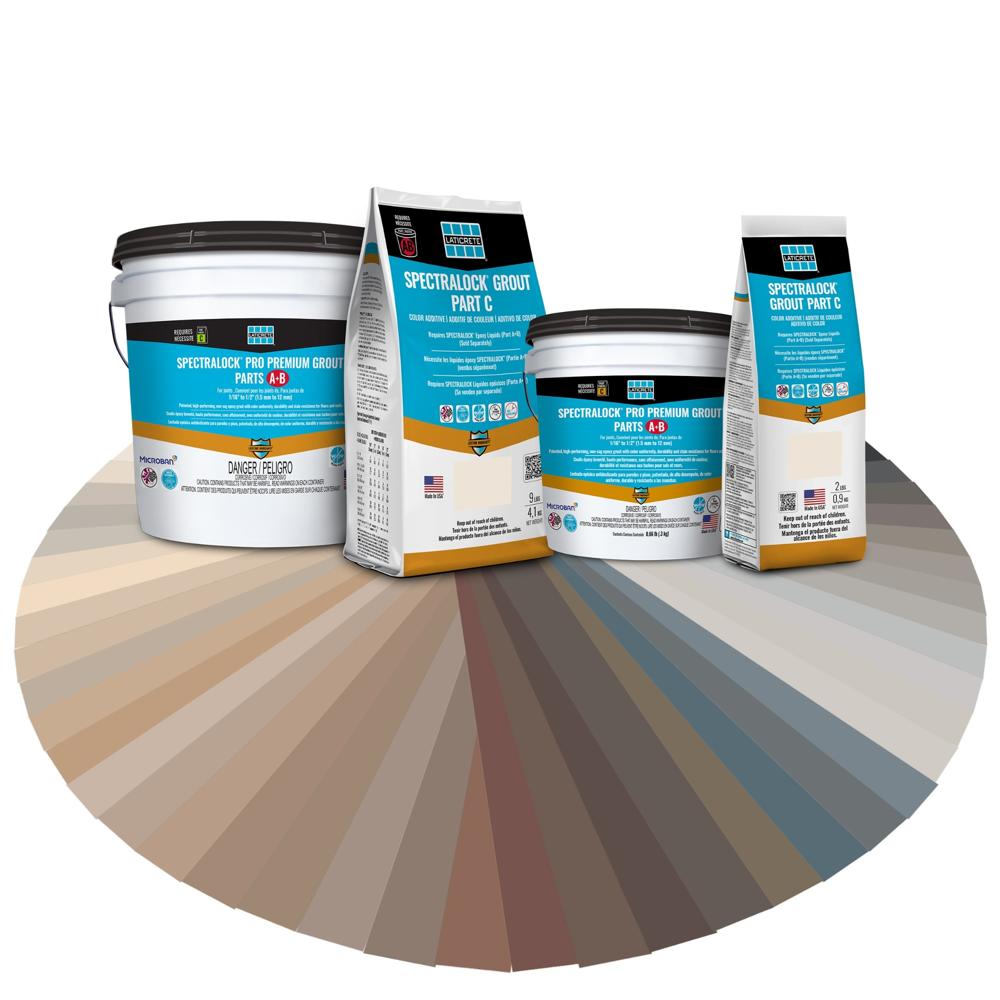
Best Grout for Showers: Why LATICRETE SpectraLOCK Pro Premium Epoxy Grout Stands Above the Rest
When it comes to building or remodeling a shower, grout isn’t just filler between tiles — it’s the first line of defense against water, stains, and mold. The wrong choice can lead to cracking, discoloration, and expensive repairs. The right choice keeps your shower beautiful and watertight for years.
So what’s the best grout for shower walls and floors? The answer is clear: LATICRETE SpectraLOCK® Pro Premium Epoxy Grout.
👉 Shop SpectraLOCK® Pro Premium Epoxy Grout
Why Regular (Cement) Grout Fails in Showers
- Porous by nature – it absorbs water, stains, and soap scum.
- Requires sealing – and resealing, which most people don’t do.
- Color shifts & hairline cracks – especially under constant moisture and heat.
Why Epoxy Grout Is Different
- Non-porous – resists water absorption and stains.
- No sealer needed – one less maintenance headache.
- High strength & low shrinkage – no cracks and callbacks.
- Color-true – what you install is what you keep.
Why SpectraLOCK® Pro Premium Is the Pick
- Installer-friendly working time and smooth spread.
- Consistent color across walls and floors.
- Proven in commercial and residential showers.
👉 See all SpectraLOCK® options
How to Use It in Your Shower
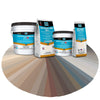
- Mix the three components: Part A (Resin), Part B (Hardener), and Part C (Color Powder) — per instructions included.
- Spread with an epoxy grout float, forcing grout firmly into joints.
- Clean on schedule using the included wash packets/sponges to remove haze.
- Let it cure fully before use. Enjoy a low-maintenance, mold-resistant shower.
Tools You Actually Need
- Epoxy grout float & margin trowel
- Two clean buckets, sponges, microfiber towels
- Timer (don’t wing the wash times)
- Gloves; good ventilation
Real-World Notes (No Sugar-Coating)
- Working time is finite. Mix manageable batches. If you overmix, you’ll rush and leave haze.
- Temperature matters. Hot rooms shorten open time; cool the space or your mix.
- Textured/pebble floors: It’s fine to use, but plan extra time for thorough cleaning of the surface.
FAQ (Quick Answers)
Do I need to seal SpectraLOCK®? No. It’s non-porous epoxy.
Wall and floor safe? Yes, designed for vertical and horizontal applications.
Color consistency? Excellent, assuming proper mixing and wash timing.
Is it harder to apply than cement grout? A bit. Follow the timing, and it’s straightforward.
The Takeaway
Don’t cut corners on grout — it’s the foundation of a long-lasting, low-maintenance shower. For anyone serious about durability, hygiene, and beauty, LATICRETE SpectraLOCK® Pro Premium Epoxy Grout is the absolute best choice.
- Lance Charnock