Table of Contents
- What Is Vinyl Plank Flooring and How to Install Vinyl Plank Flooring Correctly?
- Tools Needed to Install Vinyl Plank Flooring
- Step 1: Prepare the Subfloor Properly
- Step 2: Acclimate the Flooring
- Step 3: Plan Your Layout
- Step 4: Install the First Row
- Step 5: Continue Installing Rows
- Step 6: Install Around Obstacles
- Step 7: Install Trim and Transitions
- Common Mistakes When Installing Vinyl Plank Flooring
- Can You Install Vinyl Plank Flooring Over Existing Floors?
- How Long Does Vinyl Plank Flooring Installation Take?
- When to Consider Professional Installation
- Final Thoughts Before You Install
- Shop Vinyl Plank Flooring Online
- FAQs
How to Install Vinyl Plank Flooring (Step-by-Step Guide)
If you're researching how to install vinyl plank flooring, you're probably wondering:
Is this really DIY-friendly? Does the floor need to be perfectly level? What tools do I need?
The good news is that vinyl plank flooring is one of the most straightforward hard surface floors to install. With proper preparation and careful planning, many homeowners successfully complete installations themselves.
In this step-by-step guide, we’ll walk you through exactly how to install vinyl plank flooring the right way, including subfloor preparation, layout tips, and common mistakes to avoid.
What Is Vinyl Plank Flooring and How to Install Vinyl Plank Flooring Correctly?
Vinyl plank flooring (often called LVP or luxury vinyl plank) is a layered synthetic flooring product designed to replicate the look of hardwood. It features:
• A durable wear layer
• A printed design layer
• A rigid or flexible core
• A backing layer
Most modern vinyl plank flooring uses a click-lock system that allows planks to snap together without glue or nails. Some products are glue-down, but floating click-lock is the most common for residential use.
If you're still comparing options, see our guide on engineered vs solid hardwood flooring to understand how vinyl compares to real wood alternatives.
Tools Needed to Install Vinyl Plank Flooring
Before starting your project and learning how to install vinyl plank flooring properly, gather the following tools:
• Tape measure
• Pencil
• Utility knife
• Straight edge
• Rubber mallet
• Spacers
• Tapping block
• Pull bar
• Level or long straightedge
• Jigsaw (for complex cuts)
Having everything ready will make installing vinyl plank flooring much smoother.
| Tool | Purpose |
|---|---|
| Tape Measure | Measure room dimensions and plank spacing |
| Utility Knife | Cut vinyl planks cleanly |
| Spacers | Maintain expansion gaps along walls |
| Rubber Mallet | Secure click-lock planks without damage |
| Straight Edge | Guide accurate plank cuts |
| Level | Check subfloor flatness before installation |
Step 1: Prepare the Subfloor Properly
Subfloor preparation is the most important step when learning how to install vinyl plank flooring.
Your floor does NOT need to be perfectly level — but it must be flat.
There is a difference:
• Level = horizontal
• Flat = no dips, humps, or uneven transitions
Vinyl plank flooring can be installed on a flat surface even if it’s slightly out of level. However, it cannot be installed over high spots or low areas that exceed manufacturer tolerance (typically 3/16" over 10 feet).
How to Check Subfloor Flatness
• Place a long level or straightedge across the floor
• Mark high and low spots
• Sand down high areas
• Use patch compound or self-leveling underlayment for low areas
Skipping this step can lead to clicking failure, plank separation, or premature wear.
If installing over concrete, moisture testing is also recommended.
Choosing a high-quality rigid core product can also help minimize minor subfloor imperfections and provide added stability during installation. For example, Paramount RigidCORE Cornerstone features a durable rigid core construction designed for dimensional stability and easy click-lock installation.
Step 2: Acclimate the Flooring
Most vinyl plank flooring requires acclimation before installation.
Bring the unopened boxes into the room and allow them to sit for 24–48 hours at normal living temperature (65–85°F). This helps prevent expansion or contraction after installation.
Step 3: Plan Your Layout
Planning prevents awkward cuts and improves the final look.
When installing vinyl plank flooring:
• Measure the room width
• Divide by plank width
• Adjust first row if final row would be too narrow
Avoid ending with a plank less than 2 inches wide. Centering the layout often creates a more balanced appearance.
Also stagger end joints by at least 6 inches between rows.
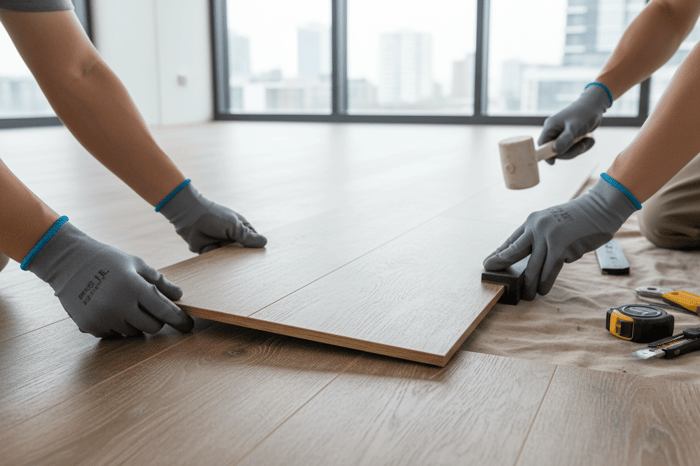
Step 4: Install the First Row
When learning how to install vinyl plank flooring, the first row sets the tone.
• Start along the longest straight wall
• Place spacers to maintain expansion gap (usually 1/4")
• Connect planks using click-lock system
• Check alignment frequently
Keep the first row straight — any mistakes here multiply across the room.
Step 5: Continue Installing Rows
After completing the first row:
• Angle new plank into previous row
• Lower and lock into place
• Use tapping block gently if needed
• Maintain stagger pattern
Most vinyl plank flooring installations move quickly once the first few rows are locked in.
For cuts:
• Score and snap straight cuts with utility knife
• Use jigsaw for vents or curves
Step 6: Install Around Obstacles
Door frames, vents, and transitions require careful cuts.
For door jambs:
• Undercut the frame
• Slide plank underneath
This creates a cleaner look than cutting around the trim.
Step 7: Install Trim and Transitions
After all vinyl plank flooring is installed:
• Remove spacers
• Install baseboards or shoe molding
• Add transition strips between rooms
Do NOT secure trim directly to the floor — it must float freely.
Common Mistakes When Installing Vinyl Plank Flooring
Many installation failures happen due to preventable errors.
Avoid these:
• Skipping subfloor prep
• Ignoring expansion gaps
• Installing over soft or unstable surfaces
• Not staggering joints
• Failing moisture test over concrete
Proper preparation is more important than speed.
Can You Install Vinyl Plank Flooring Over Existing Floors?
In many cases, yes.
Vinyl plank flooring can be installed over:
• Existing tile (if flat)
• Hardwood (if flat and stable)
• Concrete
• Laminate (if firmly bonded)
It should NOT be installed over:
• Carpet
• Cushioned vinyl
• Uneven or damaged surfaces
When in doubt, removal is safer long-term.
How Long Does Vinyl Plank Flooring Installation Take?
For an average 500 square foot room:
• DIY: 1–2 days
• Professional install: 4–8 hours
Complex layouts or heavy prep increase time.
When to Consider Professional Installation
Even though vinyl plank flooring is DIY-friendly, professional installation may be better if:
• Subfloor needs extensive flattening
• Large open spaces require precise layout
• Stairs are involved
• You're installing glue-down vinyl plank
At Flooring Market, we can help you choose products designed for easier installation and long-term performance.
Final Thoughts Before You Install
Installing vinyl plank flooring is achievable for many homeowners — but preparation determines performance.
A flat subfloor, careful layout, and proper expansion spacing are what separate a long-lasting floor from one that fails prematurely.
If you're ready to choose the right vinyl plank flooring for your space, Flooring Market makes it easy to compare products, order samples, and get expert guidance — all online.
Shop Vinyl Plank Flooring Online
Browse our full selection of luxury vinyl plank flooring and find the right style, thickness, and wear layer for your project.
Need help deciding? Our team is available to answer installation questions and ensure your flooring choice fits your space and lifestyle.
If you're ready to install vinyl plank flooring, choosing a rigid core vinyl plank flooring product designed for floating installation can make the process easier.
Paramount RigidCORE Cornerstone Northern Hickory

$67.80
Minimum Order: 200 Sq. Ft.Orders less than 200 Sq. Ft. will be canceled Width: 7” Length: 48” Thickness: 3.5mm+1.0mm pad Attached Pad: Yes Coverage: 28.37 Sq. Ft./Carton Wearlayer: 12 MIL Install Type: Floating Residential Warranty: 15 Year Light Commercial Warranty:… read more
FAQs
Does vinyl plank flooring need to be perfectly level?
No. Vinyl plank flooring does not need to be perfectly level, but it must be flat. A floor can be slightly sloped and still perform well, as long as there are no dips or humps beyond manufacturer tolerances. Most brands allow up to 3/16 inch variation over 10 feet. If the floor is uneven, planks may separate, click joints may fail, or soft spots may develop. Flattening high and low areas before installing vinyl plank flooring prevents long-term issues.
Can I install vinyl plank flooring myself?
Yes, many homeowners successfully install vinyl plank flooring as a DIY project. Click-lock systems are designed for straightforward installation with minimal specialized tools. However, success depends heavily on proper subfloor preparation and careful layout planning. If the room is large, irregularly shaped, or requires significant floor leveling, professional installation may save time and reduce risk.
Do you need underlayment for vinyl plank flooring?
Some vinyl plank flooring includes an attached pad and does not require additional underlayment. Others may benefit from moisture barriers or acoustic layers depending on subfloor type. Always follow manufacturer recommendations. Over concrete, a vapor barrier may be required even with attached padding.
Can vinyl plank flooring be installed over concrete?
Yes. Vinyl plank flooring is commonly installed over concrete slabs. The slab must be flat, clean, and dry. Moisture testing is recommended to ensure long-term performance. If moisture levels are high, a vapor barrier or moisture mitigation system may be needed before installation.
How long does vinyl plank flooring last?
High-quality vinyl plank flooring typically lasts 15–25 years in residential settings. Longevity depends on wear layer thickness, traffic levels, and maintenance. Proper installation plays a major role in lifespan.